



Revit shortcuts are two-letter key combinations typed directly on your keyboard to launch a command, without navigating the ribbon or pressing Enter.
For example, WA opens the Wall tool, DR places a door, VV controls view visibility, and KS opens the Keyboard Shortcuts dialog, where all these shortcuts are managed.
These are just some of the main Revit shortcuts, but there are many more. In this article, we’ll explain what they do and how to use them.
Ready to save time while designing? Keep reading!
Why do Revit shortcuts use two letters?
Before memorizing anything, it helps to understand that each command was assigned an abbreviation related to its English name.
For example, WA comes from wall, WN from window, and MV from move.
That’s why many keyboard shortcuts can seem random to anyone using Revit in another language.
They aren’t random. They’re mnemonics based on English terms. Once you recognize the pattern, they become much easier to use in your day-to-day workflow.
Brainscape estimates that computer users lose around two seconds per minute when they switch from the keyboard to the mouse. That adds up to 64 hours per year, or 3.3% of their productivity.
If you want to see the complete list of Revit shortcuts, Autodesk® provides an official list of commands in its Autodesk guide, including a downloadable PDF.
What are the different types of Revit shortcuts?
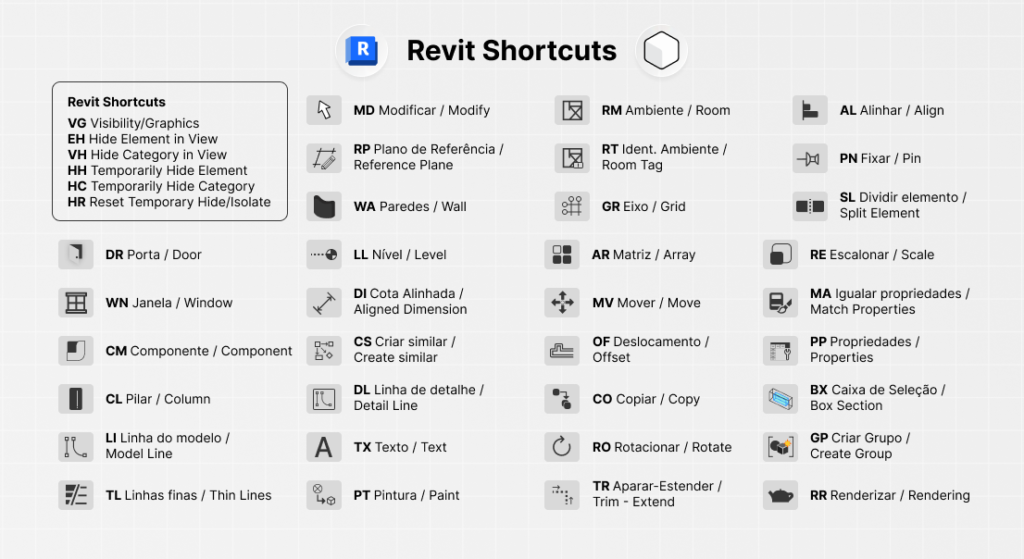
Revit shortcuts fall into four groups that align the main stages of a project.
There are creation shortcuts, which add new elements to the model; editing shortcuts, which modify what is already there; view shortcuts, which control what appears on screen; and documentation shortcuts, which handle dimensions, text, and tags.
Understanding these groups is more useful than memorizing an alphabetical list because it helps you learn each command in the context you’ll use it.
Revit shortcuts for creating project elements
This is the group that saves the most clicks because these are commands you may use dozens of times while working on a single floor plan.
- WA: creates a wall
- DR: places a door in the wall under the cursor
- WN: places a window
- CM: places a component, this is the shortcut that brings any Revit family into the model
- CL: adds a column
- BM: adds a structural beam
- LL: creates a new level and generates the corresponding floor plan
- GR: places grids lines
- RM: places a room with its name and area
- CS: creates an element identical to the one currently selected
Of all these shortcuts, CS is the easiest to overlook and the one that saves the most time because it keeps you from going back to the Project Browser just to find the right type.
Revit shortcuts for editing what is already in the model
Creation commands are the most visible, but editing commands are the most frequent .
- MV: moves the selected element
- CO or CC: copies
- RO: rotates
- AL: aligns
- AR: creates a linear or radial array
- TR: trims or extends two elements until they form a corner
- SL: splits a wall, floor, or line at the point you click
- DE: deletes the selected element
- RE: resizes
- MA: matches the type properties of one element to another
- PT: applies a material to a surface
- SF: splits a face
Note: two points here are worth highlighting.* MA can fix a wall with the wrong type in seconds, but don’t expect it to behave exactly like Match Properties in AutoCAD, because it matches the type rather than the formatting. PT and SF work together to apply finishes to only part of a face without creating new geometry.
Revit shortcuts for controlling what appears on screen
This category saves the most time in large models, and it’s also the one that causes the most confusion.
- VV or VG: opens Visibility/Graphics dialog for the current view
- HH: temporarily hides the selected element
- HC: temporarily hides the element’s category
- HI: isolates the element and hides everything else
- HR: resets temporary Hide/Isolate and returns the view to its normal state
- RH: shows in red what has been permanently hidden in the view
- TL: toggles Thin Lines so you can display the actual line weights
- BX: creates a section box around the selection in 3D
- ZA: adjusts the zoom to fit everything
- PP: opens the Properties palette
The most common source of confusion in this group is how to bring hidden elements back in Revit.
HR only ends temporary hiding, while RH shows elements that were permanently hidden.
Remembering the difference between these two shortcuts solves most of those “where did my element go?” moments, including cases such as contour lines that don’t appear in Revit.
Revit shortcuts for dimensions, annotations, and documentation
Documentation is where shortcuts are most often overlooked, even though it’s also one of the most repetitive parts of the workflow.
- DI: places an aligned dimension
- TX: adds text
- DL: creates a detail line that is visible only in the view where it was drawn
- TG: applies a tag by category
- RT: names a room that has already been placed
- EL: creates a spot elevation
- LW: changes the line style
- UN: opens Project Units
If your workflow involves a lot of annotation, TG is worth exploring in more detail. Check out our step-by-step guide on how to display tags in Revit so you don’t waste time troubleshooting tags that won’t appear in a view.
How to create and customize your own Revit shortcuts
To create your own shortcuts, type KS, or go to View> User Interface> Keyboard Shortcuts.
The Keyboard Shortcuts dialog lists all commands and lets you filter them by tab. Select the command you want, enter the key sequence in the Press new keys field, and assign it.
Two best practices can make a big difference. First, assign more than one shortcut to the same command if the default key sequence feels awkward to type, since Revit supports multiple shortcuts for a single command. Second, export your shortcut list directly from the dialog and import it on other computers to standardize the setup across your entire team.
If your firm already uses a shared Revit template, treating keyboard shortcuts as part of that same office standard helps avoid rework.
Fast shortcuts need a library that can keep up
Now think about your actual workflow…
You type CM in less than a second, the command opens immediately, and then the real bottleneck begins: finding the right family, downloading it from a website, checking its parameters, and loading it into the project.
The shortcut did its part. Now the library needs to keep up.
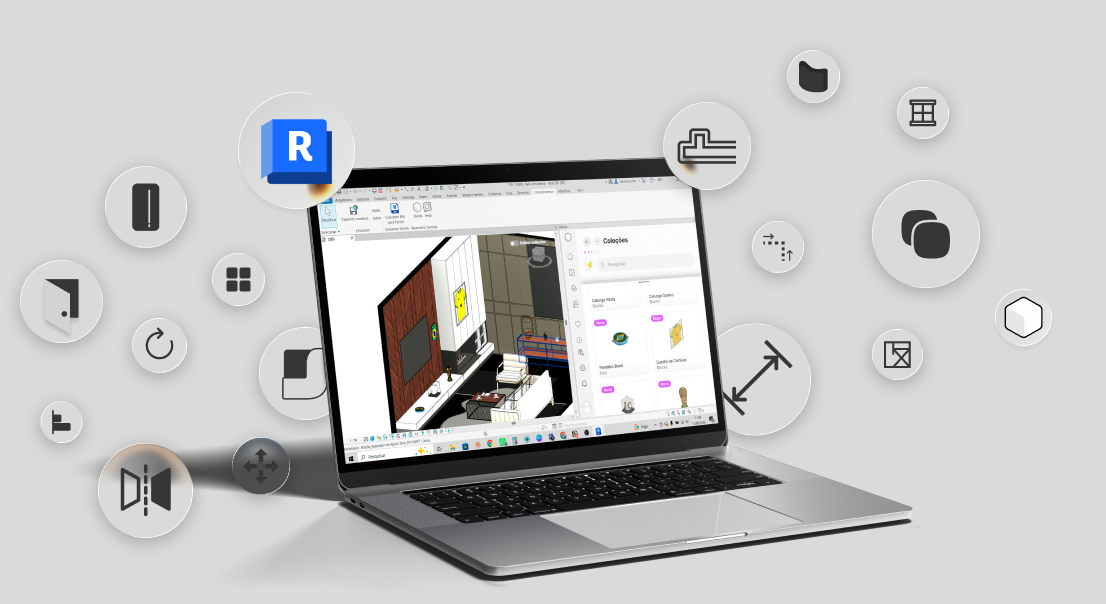
That’s where Blocks® comes in. The plugin runs inside Revit and puts more than 9,000 parametric families just a click away, including more than 7,000 digitized products from real manufacturers and 25 new families every week.
No leaving Revit, no digging through download folders, no checking scale. Install the plugin and feel the difference on your next project!
Conclusion
The truth is, no shortcut can complete a project on its own.
What really changes your day-to-day workflow is reaching the point where your hand executes the command before you consciously think about it, and that only comes with repetition.
So choose three Revit shortcuts you don’t use yet, make yourself use them for a week, and then add three more. In two months, the keyboard will start to feel like an extension of the way you think.
We believe productivity in Revit never comes from a single adjustment. It comes from combining well-chosen shortcuts, an organized template, and a reliable library.
To keep improving in all three areas, follow the Blocks® blog. Every week, we publish new content about Revit, BIM, and everyday project workflows.
FAQ: frequently asked questions about Revit shortcuts
What are the most commonly used Revit shortcuts?
The shortcuts you’ll use in almost every project include WA for Wall, DR for Door, WN for Window, CM for Component, MV for Move, CO for Copy, AL for Align, DI for Dimension, and VV for Visibility/Graphics. Memorizing just these nine can eliminate many of the clicks from your daily workflow.
How do you customize keyboard shortcuts in Revit?
Type KS or go to View > User Interface > Keyboard Shortcuts. Find the command in the list, enter the new sequence in the Press new keys field, and confirm the assignment. Revit allows more than one shortcut for the same command, so you don’t have to give up the default shortcut to create your own.
How do you import a set of custom Revit shortcuts?
The Keyboard Shortcuts dialog includes both export and import options. Export the configuration from one computer, share the file with your team, and import it on the other workstations. This is how firms can keep everyone using the same shortcut setup, even when someone changes computers.
Where can you find the complete list of Revit shortcuts?
The official reference is the Autodesk shortcut guide, which organizes commands by tab and provides a downloadable PDF. It’s worth checking whenever you can’t find the shortcut for a specific command.
Do Revit shortcuts actually improve productivity?
Yes, and the effect adds up over time. Brainscape’s calculation points to 64 hours lost each year moving back and forth between the keyboard and mouse. Add to that the repetition involved in a BIM project, where commands such as VV, HH, and MV may be used dozens of times within the same view.
What tools work well with Revit shortcuts?
A shortcut speeds up the command itself, not the content you bring into the model. That’s why it makes sense to combine keyboard shortcuts with a library plugin such as Blocks®, which places parametric families in your project with one click, without manual downloads or searching through folders.