In the world of architecture, textures hold a very important place in a project, as they are crucial for shaping the client’s entire experience of a project.
Think about it: the very texture of stone walls in a house might inspire a vintage furniture selection.
That’s why texture choices are best made early, during the 3D development phase. Yet, many professionals often struggle with applying them in Revit.
This difficulty stems from the complexity of textures in Revit: as they are part of a BIM environment, they require specific data.
In this article, Blocks® will guide you through finding the perfect textures for your BIM project and how to apply them. Let ‘s get started?
What are Revit Textures?
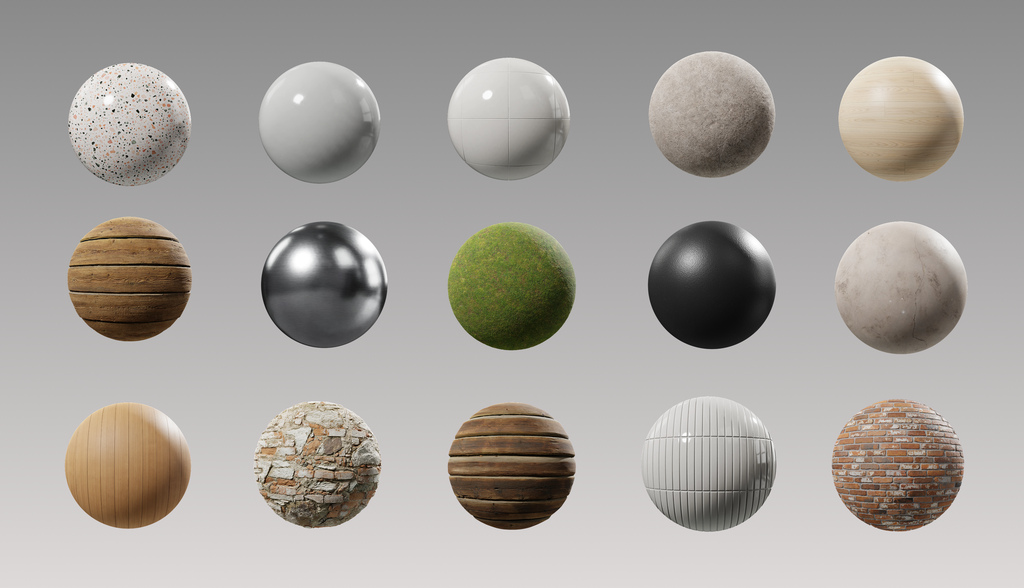
Revit textures are images applied to the surfaces of model elements to visually simulate the appearance of materials like wood, concrete, glass, and more.
They are part of a broader system within Revit called materials, which truly determines an element’s behavior and appearance within the model.
A texture is, therefore, the visual layer of that material, what the user can see. Typically, it’s an image file that is “mapped” onto the object’s geometry.
In Revit, users don’t directly manipulate with “loose” textures, instead, you work with materials that contain embedded textures as part of their properties.
These materials can be configured and managed in the Material Editor, allowing you to fine-tune the color, glossiness, transparency, surface pattern, and the texture itself.
Thus, a wall with a brick texture won’t just be any wall; it can also have specific properties. That’s the power of BIM!
How to use textures for Revit?
Adding textures in Revit might seem akin to playing The Sims for some, but the reality is quite different.
Just as professionals meticulously develop a project’s structure, they must exercise the same diligence when applying its texture.
Below, we’ve outlined a step-by-step guide on how to use Revit textures in your project. Let ‘s dive in!
1. Access the material browser
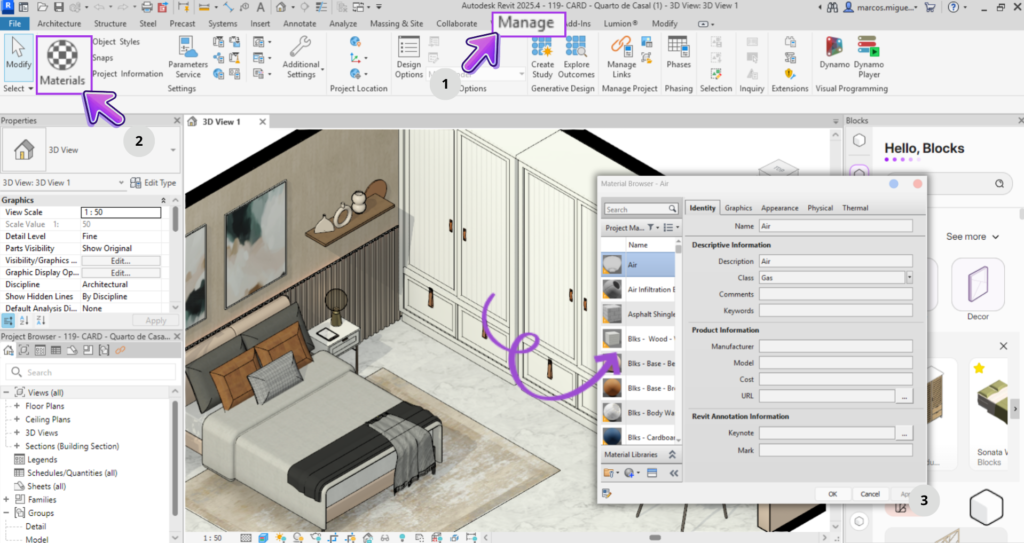
The first step is to open Revit and select the project you’ll be working on.. Once loaded, navigate to the Material Browser section, click on “Manage,” and then on “Materials.”
This is your central hub for controlling everything related to materials in the project, including Revit textures.
From here, you can access both parameters, such as name, manufacturer information, and costs, and assets that consolidate the graphic and physical properties used in views and renderings.

Bárbara Pavanello
CEO | Blocks®
“Assets are the fundamental building blocks of information that comprise a material in Revit. Each material can leverage various assets: the Appearance Asset, which dictates its visual qualities (texture, brightness, color); the Physical Asset, containing physical data such as density; and the Thermal Asset, utilized for energy analyses. This comprehensive approach ensures a material is simultaneously visually realistic and technically precise. The best part? You can effortlessly swap out just the visual asset, for instance, without compromising the underlying technical data. This is a crucial concept for anyone aiming to work with BIM comprehensively and intelligently.”
2. Create or edit a material
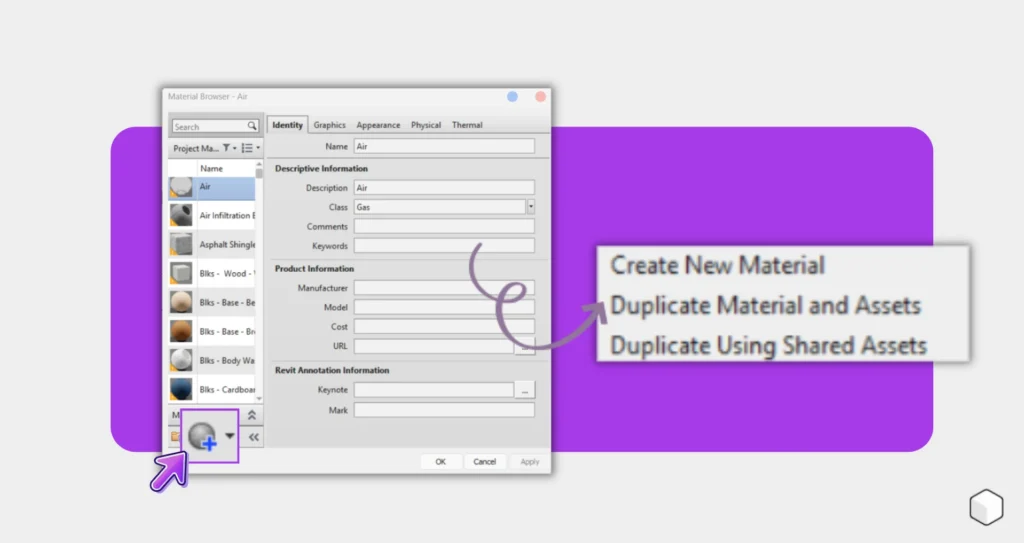
If you prefer not to alter Revit’s default material, click “New Material” in the bottom corner of the browser and choose between “Create New Material” or “Duplicate Selected Material.”
Duplicating a material is the most secure method to preserve the original while you fine-tune textures, properties, and nomenclature (e.g., “Wall_Rustic_Brick_01”).
Keep in mind that upon installing Revit, a series of bitmaps are available, such as bricks, woods, concretes, metals, and more.
However,you’re also free to add your own. We’ll show you how to incorporate other textures further down in this article. .
3. Define the material's appearance
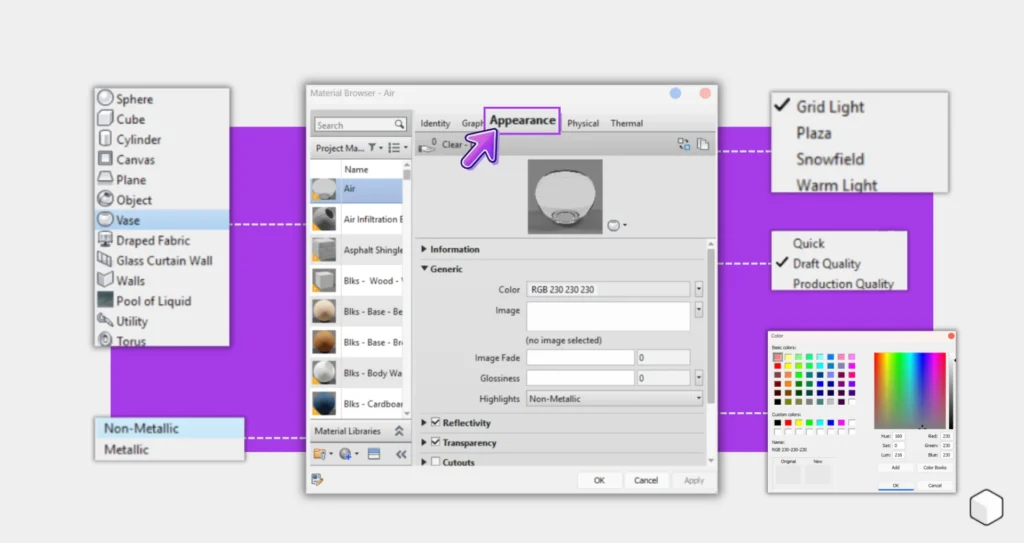
Once your material is prepared, access the “Appearance” tab to select a compatible asset. This might be a generic PBR, glass, metal, or another pre-configured package.
Within this tab, you’ll define the base color (diffuse), and precisely control its glossiness, reflectivity, transparency, and even self-illumination.
This option ensures that the material’s interaction with light aligns with real-world realism.
4. Adjust texture properties
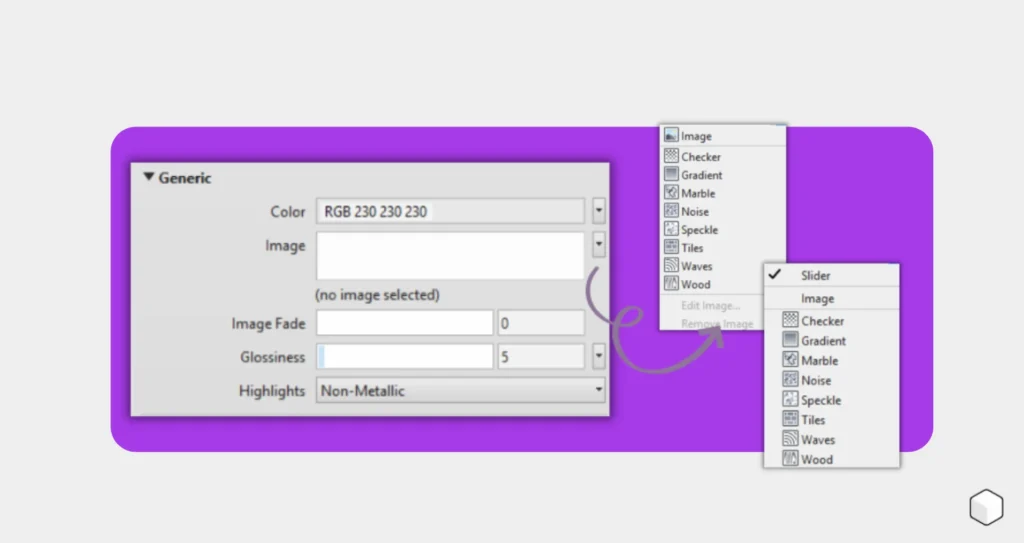
To apply an image as a texture, click on the thumbnail of the desired channel (Color, Bump, Roughness, etc.) to open the Texture Editor.
From there, you’ll point to BMP, JPG, JPEG, or PNG files, define the Sample Size (e.g., 2m x 2m), and adjust alignment, rotation, and repetition until the pattern appears seamlessly natural on the surface.
5. Apply the material to the element

Back in the main Revit menu, to transfer the material to the model, activate the “Paint” tool found under “Modify” > “Geometry” > “Paint,” select your material from the dialogue box, and hover over the desired face until you see it highlighted.
Alternatively, you can also assign the material directly within Type Parameters or Family Parameters, depending on your chosen application strategy.
6. Check appearance in rendering
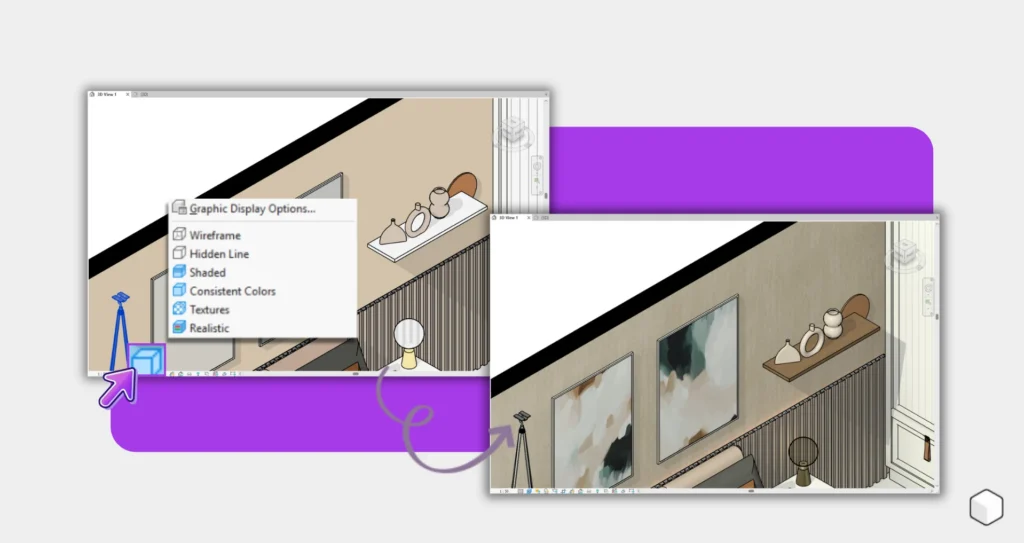
Once all your materials are applied, switch the visual style to “Realistic” in the view control bar (in the lower right corner).
This mode provides a real-time preview of how your textures and light settings interact, or, if you prefer even more refined details, launch a complete rendering to evaluate shadows, reflections, and depth with high fidelity.
Where is the Revit Texture Folder Located?
On Windows, the default folder where Revit stores its texture bitmaps (Autodesk Material Library) is located at:
- C:\Program Files (x86)\Common Files\Autodesk Shared\Materials\Textures
Within this folder, you’ll discover numbered subfolders (1, 2, and 3), each of these contains a “Mats” folder with low, medium, and high-resolution files that Revit uses by default for color, bump, roughness, among others.
How to Download Free Revit Textures and Apply Them?
So far, we’ve taught you how to apply native Revit textures. But there’s actually a far simpler method for incorporating additional ones.
Revit provides only a limited selection of basic textures for its users, but we know that’s not enough for an architectural project.
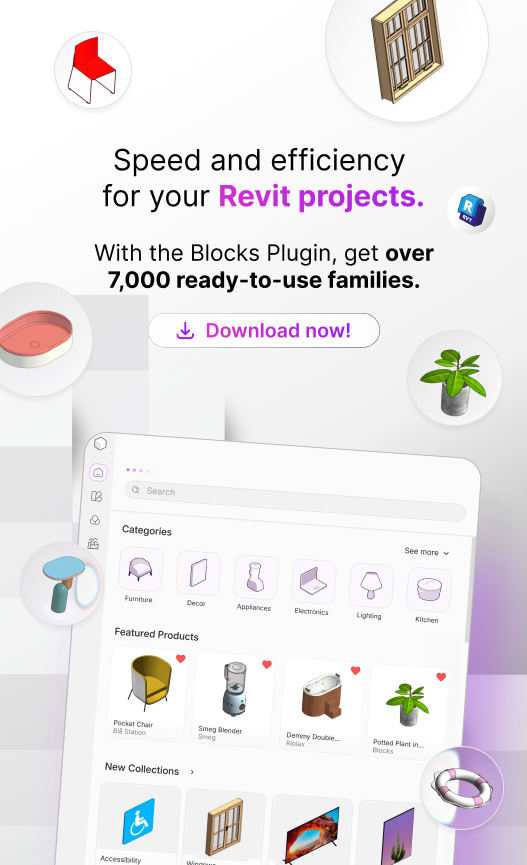
That’s where the Blocks Plugin comes in! It features countless textures developed by a team of BIM specialists in partnership with Portobello.
With over 80 textures available you can seamlessly apply them anywhere in your project. And the best part? Adding them is incredibly simple. Just follow these steps:
First, follow the step-by-step guide on how to install the Blocks Plugin on your computer.
With the plugin installed, open your project in Revit, click on “Add-ins”, and then select the Blocks plugin.
On the right side of your screen, a tab with our plugin will open. Log in with your Blocks account.
Once that’s done, still in the Blocks plugin, look for the “Materials” tab.
That ‘s it!! Now you can see all our textures to apply in your project.
Application is incredibly straightforward: just click on the desired texture, wait for it to download, and apply it wherever you want.
See how simple it is to apply textures in Revit? Our collaboration with Portobello has already yielded numerous exquisite collections, including Solaire, The Edge, Ocre Viga, Mos Ripa, and many more!

Karyna Araújo
BIM Analyst | Blocks®
“A bitmap is simply the image file used as a texture within Revit materials—it’s what visually defines the surface’s appearance, whether it’s wood, stone, or fabric. When you apply a material containing a texture, you’re essentially viewing a bitmap mapped onto the model’s geometry. These can be JPEG, PNG, or TIFF files. Crucially, the quality and dimensions of the bitmap directly influence the realism of your render. Therefore, selecting high-quality, properly scaled bitmaps is vital to ensure your project achieves the desired visual finish.”
Free Revit Textures? Find Them in the Blocks Plugin!
Looking to access all Portobello textures with the Blocks Plugin? Then, don’t miss out on downloading our plugin for free!
Beyond the impressive 80 available textures, we also provide over 5,000 parametric families for your project.
Our furniture is as practical as applying textures in projects. With just a few clicks, you can assemble a complete environment from scratch.
Conclusion
While applying textures in Revit might seem complex, with this detailed guide and the right tools, like the Blocks Plugin, it becomes an easy and enjoyable task.
The customization and enhanced realism brought by textures significantly elevate project quality, delivering precise and impactful visualizations for your clients.
Ready to truly impress your clients with the perfect textures for their project? Download our plugin today and unlock access to a wealth of parametric families!
Enjoyed this content? Be sure to visit the Blocks blog for even more valuable insights.